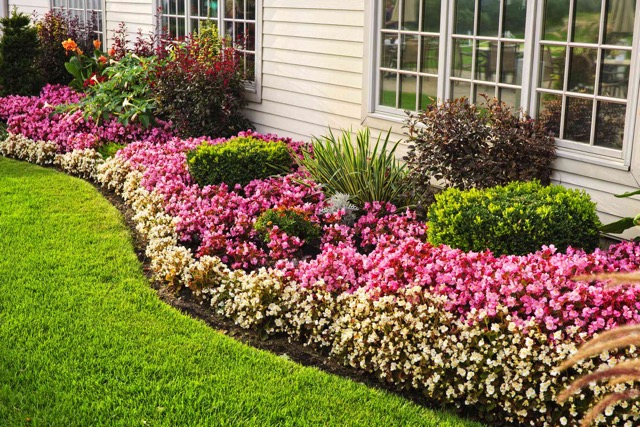
Having an automatic irrigation system can help you save time and effort with your plants. This includes gardens, flower beds, greenhouse plants, vegetable patches, lawns and other greenery. But for the system to work well year after year you need to maintain it properly. One crucial part of maintenance is preparing the system for winter and restarting it correctly after the break. This ensures the automatic watering keeps working smoothly without interruption.
Curious How to Open Irrigation Sprinkler System In Spring? We will hep you with that!
Starting a sprinkler system after winterizing it needs some steps. Make sure the water supply is open. Then inspect the system parts for any problems or leaks. Next, slowly turn on the main valve to let water flow little by little. This stops loud bangs from fast water flow. Check if each zone works fine. Adjust any sprinkler heads that need tuning. Last set the timer for when the sprinklers will water.
What are key steps to open irrigation sprinkler system in spring?
Inspect System Components: Examine each piece of the irrigation system. Look for any harm, cracks or wear. Check pipes, valves, sprinkler heads and control panel. This makes sure the system works right before you use it;
Clear Debris: Take away leaves, sticks and other things that got there in winter. Remove anything stopping water from the sprinkler heads and valves. If you don’t, dirt may block the water flow. Clean sprinklers work better;
Test Water Supply: Turn the main water supply on slowly. Let the water flow into the irrigation pipes. Look for any water leaking out. Listen for strange noises. Those could mean there is a problem with the water supply. Make sure the water pressure stays steady. The pressure should be within the recommended range for the system;
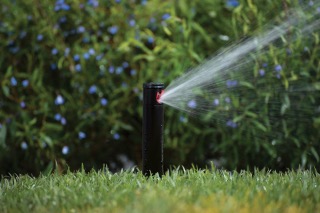
Check Sprinkler Heads: Switch on each sprinkler zone watching how sprinkler heads operate individually. Look for good spinning, coverage, damage or blockage signs. Fix or change any faulty heads to ensure even watering;
Program Controller: When it is summer you should water your plants more. Different plants need different amounts of water. Dry soil needs more water. Wet soil needs less water. Check your plants and soil. Set your sprinklers to water the right amount for your plants. We recommend to schedule 2 or 3 watering cycles per week. Each zone should be watered at least 25-30 minutes per cycle;
Monitor System Performance: You should look carefully at your irrigation system after starting it. Make sure it waters everything evenly. Look for leaks or other problems. Make any changes needed to use water well and keep plants healthy all through spring;
How to adjust irrigation schedule for Hunter time controller?
Reach the Controller spot: Discover the Hunter timer controller, commonly placed near valves or a control box. Open the panel front to view buttons;
Start Program mode: Hit a “Program” or “Program/Review” key usually, following the manual if unsure;
Pick out Zones: Press arrows or a dial to choose a zone. The display panel shows which zone you select;
Select Start Times: Toggle to the setup Start Times option. Press buttons or keys to add watering times. Pick specific days too;
Changing Water Time: Select the option to change how long each zone runs. Press arrow keys or number pad to set how many minutes or hours each zone waters;
Double Check Changes: Look over start times and durations for each zone. Press “Save” or “Enter” to confirm changes are right;
Leave Programming: After saving changes exit programming mode. Press “Exit” or “Program/Review”. Some will exit mode if no buttons are pushed for a while;
Test the schedule: Begin a watering cycle to examine if the schedule operates properly. Monitor each zone, ensuring correct watering patterns and modify settings if required.
How to adjust irrigation schedule for Rain Bird time controller?
Access the Controller: find the Rain Bird time box, often installed near valves or control box. Get inside the controller’s panel for programming;
Enter Programming Mode: press “Program” or “Set Program” button. The display should indicate that you’re in programming mode;
Select Program: If your Rain Bird controller has multiple programs (A, B, C, etc.) use the program selector switch or buttons to choose the program you want to adjust. It is fine if each program has its own schedule;
Set Start Times: navigate option for setting them and use arrows or keypad for desired zone start times. Be certain to set proper watering days;
Adjust Duration: Move to the option for setting watering duration (run time) for each zone. Use the arrow buttons to enter the desired duration for watering of each zone;
Review and Save Changes: Ensure accuracy after choosing start time and length for each zone. Hit “Save” or “Enter” when ready;
Exit Programming Mode: Once changes are saved exit programming by selecting “Exit” or “Done”. Controllers may automatically exit after inactivity too;
Test the Schedule: Test the schedule is working right. Manually start watering and check each zone works fine. Modify if needed.
How to adjust irrigation schedule for irrigation time controller?
Access the Controller: Look for the time controller box, usually placed near the sprinkler valves or inside a control box. Take off the panel cover to get to the programming controls. You may have to unlock a door;
Enter Programming Mode: Depending on your controller model you’ll likely press a button or combination to enter programming mode. Check the user manual if you’re unsure how;
Select Program: Pick a program number if your controller manages multiple schedules. Separate programs allow different watering schedules for each zone;
Set Start Times: Go to the setting for choosing when watering should begin. Select the right days using buttons or dial. Enter start times for every zone;
Adjust Duration: Move on to the option specifying run times. For each zone, enter how long it should water. This might be minutes or hours;
Review and Save Changes: Double-check you entered start times and run times accurately for every zone once finished. Press “Save” “Enter” or “OK” to confirm and keep your programming;
Exit Programming Mode: After saving changes, leave programming by hitting the button labeled “Exit” “Done” or “Exit Programming.” Some controllers may exit automatically if left idle;
Test the Schedule: Manually start a watering cycle. Confirm the schedule works as planned by observing each zone. Verify watering is correct; adjust settings if needed.
Sprinkler Heads Adjustment
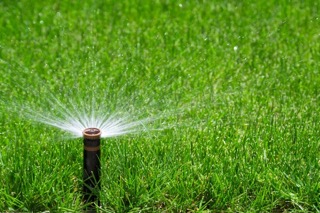
How to adjust rotating sprinkler heads?
Find Adjustment Screw: Find a screw on the top or side of the sprinkler head. This is the adjustment screw. It is very important to identify this screw first;
Turn Off Water: Shut off the water supply to the sprinkler system to avoid water spraying while adjusting;
Adjust Strength: With a screwdriver you can change the sprinkler’s spray area. Turning the screw right will make the spray smaller. Turning left will make it larger. Use the right tool to adjust the water spray It is recommended to adjust length of spray for maximum up to 15 feet;
Test Rotation: Make sure the sprinkler head moves around to water the whole area you want. Turn on the water again and watch the sprinkler head spin. See if it sprays all the spots you need it to;
Fine-Tune Radius: The sprinkler head has a radius adjustment screw near the center. Turn this screw to change how far the water sprays. Make the adjustment for the distance you want up to 360 degree;
Check and Adjust: Take a look at the sprinklers from time to time. Make sure they are watering the area well. If not change their direction. All parts should get water equally.
How to adjust pop-up spray sprinkler heads?
Find Adjustment Screw: On your sprinkler head find the tiny screw at top. It’s usually near the nozzle’s center;
Turn Off Water: To avoid spraying while adjusting turn off the water supply completely. This prevents messy mishaps;
Adjust Spray Pattern: Use a screwdriver to rotate the adjustment screw. Turn it clockwise for narrower spray patterns or counterclockwise for wider ones. Some models have slots for tool insertion;
Set Spray Direction: If possible you can also change spray direction. Simply rotate the nozzle left or right to cover your desired area precisely;
Fine-Tune Spray Distance: Adjust spray distance if needed. Twist the screw base clockwise to decrease distance or counterclockwise to increase it;
Test and Readjust: Resume water flow, scrutinize the spray pattern and range. Make adjustments, until attaining ideal coverage, devoid of overspray or arid regions.
When is it necessary to start irrigation sprinkler system?
When winter ends, you’ll want to turn on your sprinklers. But the ideal time can vary. For sandy soil that drains fast, start watering in early spring: March or April. But for clay-rich soil that stays wet longer wait until May. The grass needs to start yellowing before irrigation begins. Too much water too soon could drown your lawn. Watch for signs nature needs a helping hand. Then get those sprinklers running. So the best time to open sprinkler system is April – May.
Spring irrigation startup begins soon after frost ends. Professional technician examines and prepares the full system turning it on at season’s start. This process allows time to address dry areas or other problems. After startup, fertilizing the lawn with nitrogen restores minerals that drive growth within roots.
What difficulties may arise when starting irrigation sprinkler system?
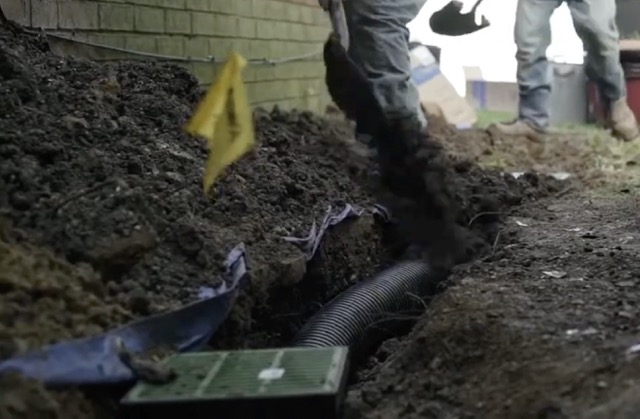
System leakage: To check for leaks, fill the system with water, turn on the pump, and build up pressure (5-6 atm). Watch the pressure gauge. A drop signals leaks that need repairs. The initial startup shows if there’s pipeline damage.
Nozzle damage: Winter snow removal often damages nozzles. For static sprinklers, replace just the nozzle. But rotors may require replacing the whole sprinkler piece. Examine nozzles closely after winter for any damage.
Clogging of system components: Clogging of parts can occur before running automatic irrigation if tanks aren’t cleaned from water quality issues. Filling tanks can let dirt from the previous year clog the entire system, causing sprinklers, nozzles, and valves to malfunction and fail quickly. Repairing or replacing those components costs a lot.
Well flooding: Well flooding is problematic for systems connected directly to wells without reservoirs or separate pumps. If flooding happens, the well requires cleaning so accumulated silt and winter dirt don’t enter the irrigation system.
We hope that you found answer on How to Open Irrigation Sprinkler System In Spring? Our Partner